Introduction to Leather Hardware Restoration
Every leather enthusiast, crafter, and vintage collector has faced the heartbreak of a broken purse clasp, a snapped belt rivet, or a detached zipper pull on an otherwise pristine leather jacket. High-end leather goods are engineered to last for decades, but the metal components—the hardware—frequently fail long before the leather itself shows signs of wear. When a snap breaks or a rivet pops out, the item is often relegated to the back of the closet, viewed as irreparably damaged.
However, throwing away a luxury handbag or a cherished leather jacket due to a failing five-cent rivet is completely unnecessary. Armed with the right leather hardware replacement tool kit, you can execute professional-grade repairs at home, saving hundreds of dollars in restoration fees while preserving the sentimental and monetary value of your items.
This comprehensive guide explores everything you need to know about selecting, using, and mastering a professional leather hardware replacement tool kit. Whether you are replacing old purse feet, installing magnetic closures, or securing heavy-duty rivets, we will walk you through the exact tools, techniques, and insider secrets to achieve flawless results every time.
What is a Leather Hardware Replacement Tool Kit?
A leather hardware replacement tool kit is a specialized collection of fasteners, functional metal components, and mechanical setting tools designed specifically to repair, modify, or construct leather goods. Unlike general-purpose home improvement toolboxes, these kits are tailored to work with the unique properties of tanned hides, which require precise pressure, clean-cut holes, and components engineered to clamp down securely without cutting or stretching the surrounding leather.
Core Components of a Complete Kit
When shopping for or assembling your toolkit, you want to ensure it covers both the hardware components themselves and the hand tools required to install them. A complete package typically includes:
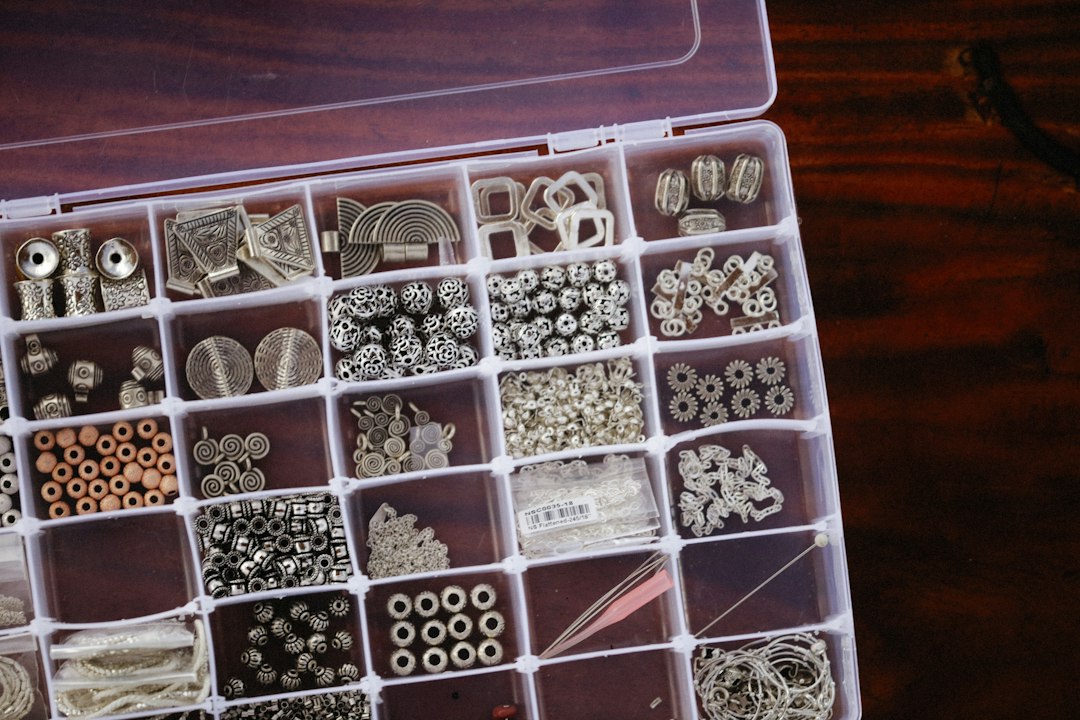
- Fasteners and Hardware: Double-cap rivets, tubular rivets, Chicago screws (sex bolts), magnetic snaps, D-rings, spring hooks, eyelets, purse feet, and turn-locks.
- Hole Punching Tools: Rotary leather punches, hollow punch tubes, and backing blocks (usually made of heavy-duty plastic, nylon, or dense rubber).
- Setting Tools: Base anvils (setter bases with multiple concave depressions), setting rods (punches designed to match the dome of the rivet), and mallets (rawhide, nylon, or rubber hammers—never use a steel hammer directly on decorative metal).
- Measurement and Marking Tools: Calipers, tailors' chalk, or scratch awls for precise alignment.
| Component Type | Primary Material | Common Application | Durability Level |
|---|---|---|---|
| Double-Cap Rivets | Solid Brass / Zinc Alloy | Straps, handles, heavy reinforcement | High |
| Chicago Screws | Steel / Nickel-Plated Brass | Interchangeable straps, modular bags | Medium-High |
| Magnetic Snaps | Iron Alloy / Stainless Steel | Flap closures, pockets, totes | Medium |
| Solid Brass D-Rings | Forged Brass | Shoulder strap attachments | Ultra-High |
Essential Hardware Types and When to Use Them
To execute a successful repair, you must match the replacement hardware to the original design and structural load of the item. Using a lightweight snap on a high-stress shoulder strap will lead to immediate failure, while using an overly bulky rivet on a delicate wallet will distort the leather.
Rivets & Tools: The Backbone of Leather Assembly
Rivets are the most common hardware items you will replace. In any quality Rivets & Tools collection, you will find variations designed for specific load-bearing scenarios. Double-cap rivets feature caps on both sides, creating a finished look on the front and back of the leather. They are ideal for visible strap attachments and decorative accents. Tubular rivets, on the other hand, are preferred for industrial strength where appearance matters less than holding power, such as on utility belts and work gear.
When setting rivets, the length of the post is critical. If the post is too long, the rivet will wobble and fail to clamp the leather tightly. If it is too short, the cap will not snap onto the shaft. A good rule of thumb is that the post should extend through the leather by roughly 1.5 to 2 millimeters before the cap is pressed on.
Chicago Screws vs. Permanent Rivets
When working on straps that may need future adjustments or replacements—such as camera straps, instrument slings, or adjustable purse handles—Chicago screws are the superior choice. They consist of a male screw and a female barrel that thread together. While convenient, always apply a tiny drop of blue threadlocker (like Loctite) to the threads before tightening them down; otherwise, daily friction and vibration will cause them to unscrew and fall out over time.
Step-by-Step Guide: Replacing Broken Leather Hardware
Restoring a piece of leather gear requires patience, precision, and the correct sequence of operations. Rushing through the setup can result in misaligned snaps, dented metal caps, or torn leather. Follow this step-by-step workflow for a professional finish.
Step 1: Removal of Damaged Hardware
Before installing new hardware, you must cleanly remove the old, broken component without enlarging the existing hole in the leather. For failed rivets, use a pair of diagonal cutting pliers or a small metal file to gently pry or grind away the cap. If dealing with stitched hardware, carefully snip the surrounding thread using a seam ripper, taking care not to puncture the surrounding hide.
Step 2: Hole Preparation and Sizing
Inspect the hole left by the old hardware. If the leather has stretched or torn, you may need to reinforce the area from behind with a small patch of scrap leather (often called backing or bridging) before installing the new component. Select a hollow punch from your Essential Toolkit for Leather Hardware Replacement and Rivet Setting that matches the exact diameter of the new fastener's shaft. Place your leather piece on a self-healing cutting mat or nylon pounding block, align the punch vertically, and strike it firmly with a mallet.
Step 3: Positioning and Setting
Insert the male component of the hardware through the leather hole from the back or front, depending on the specific design. Place the matching cap or backing piece onto the shaft. Position the assembly onto the appropriate concave well of your metal anvil base. Take your metal setting rod, place its recessed tip directly over the rivet cap, and strike it firmly with your mallet 1 to 2 times.
Expert Tip: Do not use excessive force on your first strike. It is better to give two moderate taps to ensure the shaft expands evenly inside the cap without crushing or distorting the exterior metal finish.
Choosing the Right Toolkit: What to Look For
With countless options available on the market, selecting the right leather hardware replacement tool kit can feel overwhelming. Cheap kits often feature thin, plated iron components that tarnish, rust, or bend under minimal pressure. When evaluating a kit, look for specific quality indicators.
Material Integrity of the Hardware
Ensure the hardware is made of solid brass, zinc alloy with a durable electroplated finish, or stainless steel. Avoid lightweight aluminum or hollow stamped iron unless you are working on temporary or purely decorative crafts. Solid brass can be polished back to a shine if it oxidizes, making it the gold standard for luxury leather restoration.
Variety vs. Specialization
If you are a beginner, a comprehensive starter kit containing a variety of finishes (antique brass, nickel/silver, gunmetal, and gold) along with a basic anvil and punch set is ideal. If you find yourself repeatedly fixing a specific type of item—such as high-end designer handbags—you may eventually want to invest in professional hand-press machines and specialized die sets for effortless, repeatable setting.
Maintenance Tips for Long-Lasting Leather Hardware
Once you have successfully replaced your hardware, proper care ensures it remains functional and aesthetically pristine for years to come.
- Avoid Moisture and Chemicals: Keep perfumes, hairsprays, and excessive moisture away from metal components, as alcohol and acids can strip electroplated coatings, leading to green oxidation or tarnishing.
- Lubricate Zippers and Snaps: If a snap feels overly tight or a metal zipper catches, apply a tiny amount of beeswax or specialized zipper lubricant to ease friction and prevent metal fatigue.
- Store Properly: Store leather goods in breathable dust bags rather than plastic containers, and avoid stacking heavy items on top of purses to prevent crushing structural hardware like frame locks and magnetic clasps.
Conclusion
Mastering the art of leather hardware restoration transforms you from a passive consumer into an empowered artisan. With a quality leather hardware replacement tool kit in your possession, a broken strap or a popped rivet is no longer a catastrophe—it is a simple, satisfying weekend project. By investing in the right tools, understanding the nuances of rivets, snaps, and setting techniques, and taking your time during installation, you can restore your favorite leather goods to better-than-factory condition and enjoy them for a lifetime.